Understanding Metal Roofing: A Durable Choice
Metal roofing has become increasingly popular due to its exceptional longevity, weather resistance, and modern appearance. Unlike traditional asphalt shingles, metal roofs can last upwards of 40 years with minimal maintenance. They are made from materials such as steel, aluminum, copper, or zinc, each offering unique benefits in terms of rust resistance, weight, and cost. Metal roofing is also environmentally friendly, often containing recycled materials and being fully recyclable at the end of its lifespan.
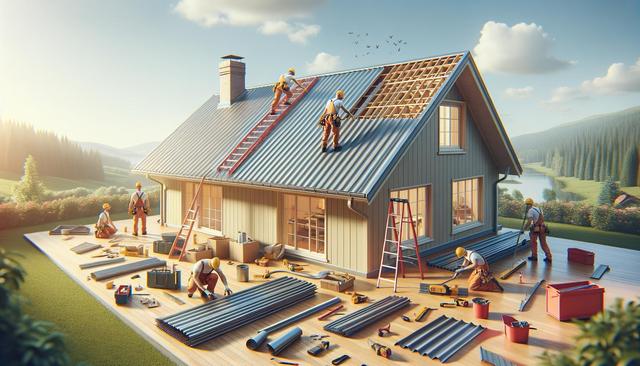
There are various types of metal roofing systems to consider, including standing seam, corrugated panels, and metal shingles. Each type has its own installation method, aesthetic appeal, and suitability for different climates. Understanding these options is essential before beginning the installation process. Homeowners and contractors alike should evaluate factors such as roof pitch, local weather conditions, and structural support when selecting a metal roofing type.
Preparing for Installation: Planning and Safety
Proper planning is crucial for a successful metal roofing installation. Before any materials are laid down, the existing roof must be evaluated. In many cases, metal roofing can be installed over an existing roof, but this depends on local building codes and the condition of the underlying structure. If removal is necessary, this should be completed carefully to avoid damaging the roof decking.
Safety is a top priority during installation. Working at heights involves significant risk, so appropriate safety gear such as harnesses, non-slip shoes, and fall protection systems should be used. Additionally, ensure the weather conditions are suitable—avoiding wet, windy, or icy days reduces the risk of accidents.
Planning also involves ordering the correct amount of materials. Measure the roof area accurately and consider ordering extra panels to account for mistakes or future repairs. Common tools and materials needed include:
- Metal panels or shingles
- Fasteners and sealants
- Underlayment materials
- Snips and metal shears
- Drill and screws
Installing the Underlayment and Flashing
The installation begins with laying down an underlayment, which acts as a moisture barrier and helps protect the roof deck. There are different types of underlayment, such as synthetic sheets and self-adhering membranes. It’s important to overlap each layer according to the manufacturer’s instructions to prevent leaks.
Next, install the flashing around roof edges, vents, chimneys, and valleys. Flashing plays a crucial role in directing water away from vulnerable areas. Improper flashing installation is one of the most common causes of roof leaks, so attention to detail is vital here. When installing flashing, ensure it is well-sealed and securely fastened to avoid movement from wind uplift or thermal expansion.
Some tips for effective underlayment and flashing:
- Use corrosion-resistant fasteners
- Seal overlaps with roofing tape or recommended adhesive
- Ensure flashing extends under metal panels for optimal drainage
Attaching Metal Panels or Shingles
Once the underlayment and flashing are in place, it’s time to attach the metal roofing panels or shingles. Begin at the bottom edge of the roof and work upward, overlapping each row to ensure proper water shedding. For standing seam systems, panels are typically attached with concealed fasteners, which not only enhances aesthetics but also reduces the risk of leaks.
Alignment is key—make sure the first panel is square to the roof edge, as this will guide the placement of subsequent panels. Use a chalk line to maintain straight rows. Secure panels using the fasteners recommended by the manufacturer, and be careful not to over-tighten, which can damage the panels or deform the sealant washers.
When cutting panels to size, use snips or shears rather than abrasive blades, which can damage protective coatings. Be mindful of thermal movement—leave a slight gap at panel ends to allow for expansion and contraction due to temperature changes.
Final Touches and Post-Installation Inspection
The installation concludes with ridge caps, trim pieces, and sealants. These components help protect seams and edges from moisture intrusion. Ridge caps are particularly important, as they cover the peak of the roof where two slopes meet. Secure these with appropriate fasteners and sealants for a watertight finish.
After installation, conduct a thorough inspection. Check for loose fasteners, improperly aligned panels, and unsealed joints. It’s also a good idea to test for leaks by spraying water across the roof and checking the interior for moisture. Address any issues promptly to prevent long-term damage.
Regular maintenance will ensure the roof performs well over time. This includes cleaning debris from the roof surface, inspecting flashings annually, and checking for signs of corrosion or wear. While metal roofs require less upkeep than other materials, proactive maintenance extends their lifespan and helps preserve their appearance.
Conclusion: Is Metal Roofing Installation Right for You?
Metal roofing installation offers a durable, energy-efficient, and low-maintenance solution for many property owners. While the process requires careful planning and precision, the long-term benefits can outweigh the upfront effort. Whether you’re a homeowner looking for a resilient roofing option or a contractor seeking a reliable installation process, understanding each step ensures a successful outcome. With proper installation and routine inspections, a metal roof can serve as a long-lasting investment in both function and aesthetics.


Leave a Reply